How to tie a jiu-jitsu belt correctly
Martial arts belts fulfil two essential functions. Firstly, it lets everyone else in the community know your skill level or rank. Depending on the colour of your belt, you are either a beginner, advanced or a student at one of the highest levels.
But apart from Jiu-Jitsu-Belt rows, it is also an important part of your suit. It helps to keep your uniform in place so that it moves with you through all your fights, complicated movements and manoeuvres without coming loose or restricting your mobility. In competition or grappling, you only have 20 seconds to retie your belt if it comes loose - requiring a quick but effective and most likely tighter knot.
That's why correct binding is so important.
Are you wondering how toJiu-Jitsu belt binds? Read on in our Viking blog to find out about the most common methods.

Standard or basic node
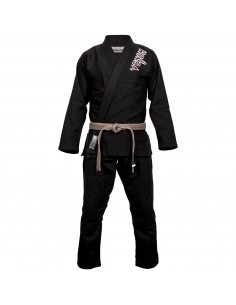
When you start your jiu-jitsu training, you will receive your first suit. Your gym may provide you with one, or you can get a high-quality gi from our online shop. During training, your trainer will show you how to tie your first belt.
Normally, the first method you learn how to tie a belt in jiu-jitsu is called a standard knot. This type of knot helps to keep your suit together during practice.
Steps for binding a standard node
To tie a standard knot, proceed as follows:
Step 1 - Start by locating the centre point of the belt. This is the point where the belt splits in half. If you let it dangle from your finger at this point, both the right and left ends should fall to the same length.
Step 2 - Once you have found the centre of the belt, place it over your belly button. Then pull the strands around your body - crossing them behind your back - until they meet again at the front.
Step 3 - Tie the ends together as you would start with your shoelaces - with an X-shaped overhand knot. The first thing you do is cross both tails. Then thread the top end behind both "layers" of the belt and pull it upwards.
Step 4 - Finally, make another X shape by bringing the upper tail over the lower tail. You will see that you have made a hole. Bring the top tail up where they cross to finish the second overhand.
Step 5 - Pull it tight.
Those who are familiar with tying a square knot or granny knot should realise that this is very similar.
Relson Gracie knot
The Gracie family is known for having first developed Brazilian Jiu-Jitsu (BJJ), so it is not surprising that some family members have developed their own knot styles. Relson Gracie's knot is similar to the standard method described above, with the difference that he does not thread a tail under the centre of the belt when tying the first overhand knot.
Steps for tying a Relson Gracie knot
Relson Gracie's knot is effectively an 'inverted' square knot, with the left side on top for the first overhand knot and then the tail of the right side on top for the second. Like the standard knot, it is tied after you have crossed the belt behind your back.
This is how it is bound:
Step 1 - When the centre of the belt is aligned with your belly button, cross both tails around your back and bring them forward.
Step 2 - Take the left tail and cross it over the right end.
Step 3 - Thread the top end (originally the end of the left side) up through the hole you created and pull it tight to create the first overhand.
Step 4 - Cross the tails again, this time with the right side on top - note that the same tail is on top for both overhangs.
Step 5 - Thread the top tail back through the hole you created and pull it tight to create the first overhand.
"Hollywood" knot
Some fighters (or film stars) liked the way their belt looked better when it didn't cross behind their back. This is how the "Hollywood" knot was born. In this method, the belt is wrapped around itself (twice) so that it stays flat around the body. It's a good choice for a cleaner appearance at any ceremony you might attend.
Proceed as follows to tie a "Hollywood" knot:
Step 1 - Start by placing one end of the belt at the side of your waist and wrap the long end around your waist twice until you hold it in front of your belly button.
Step 2 - Take the long end of the belt and pass it under the lengths already wrapped around your waist.
Step 3 - Pass the long end of the belt through the hole you have created and hold it slightly loose.
Step 4 - Pull the wrapped tail down under the belt and let it hang. Both tails should now be angled downwards and to the same side.
Step 5 - Take the first tail, lift it up and guide it down through the loop created in step 2.
Step 6 - Pull tight. The knot should resemble a fortune cookie shape when you are finished.
Choose your suitable equipment from our large martial arts range.
Now you know how to make aJiu-Jitsu belt properly tied for different occasions and events. Whether you've already dipped your toes into martial arts or are still figuring out if you want to do Jiu-Jitsu vs Muay Thai, make sure you have all the gis, belts, gloves and headgear you need to protect yourself and have a great workout while you embark on the martial arts journey.
You are not sure what you need or want to try something on, no problem. Just have a look in one of ourBranches over.


Comments (0)